

NetSuite Single Sign On (SSO)
Single Sign on
Single Sign-On (SSO) in NetSuite is a method that allows users to access their NetSuite accounts and related systems with a single set of login credentials, eliminating the need for multiple usernames and passwords. Implementing SSO in NetSuite can enhance security, streamline user access, and simplify the login process.
Benefits of SSO in NetSuite:
- Enhanced Security: SSO can strengthen security by centralizing user authentication and enforcing policies at the IdP, such as multi-factor authentication.
- User Convenience: Users have a simplified login experience, as they only need to remember one set of credentials.
- Streamlined Administration: SSO can simplify user management and reduce administrative overhead. When a user leaves the organization, their access can be revoked centrally at the IdP.
- Efficient Access to Multiple Systems: SSO can be extended to integrate with other systems and applications, allowing users to access multiple resources with a single login.
Prerequisites for Setting Up SSO
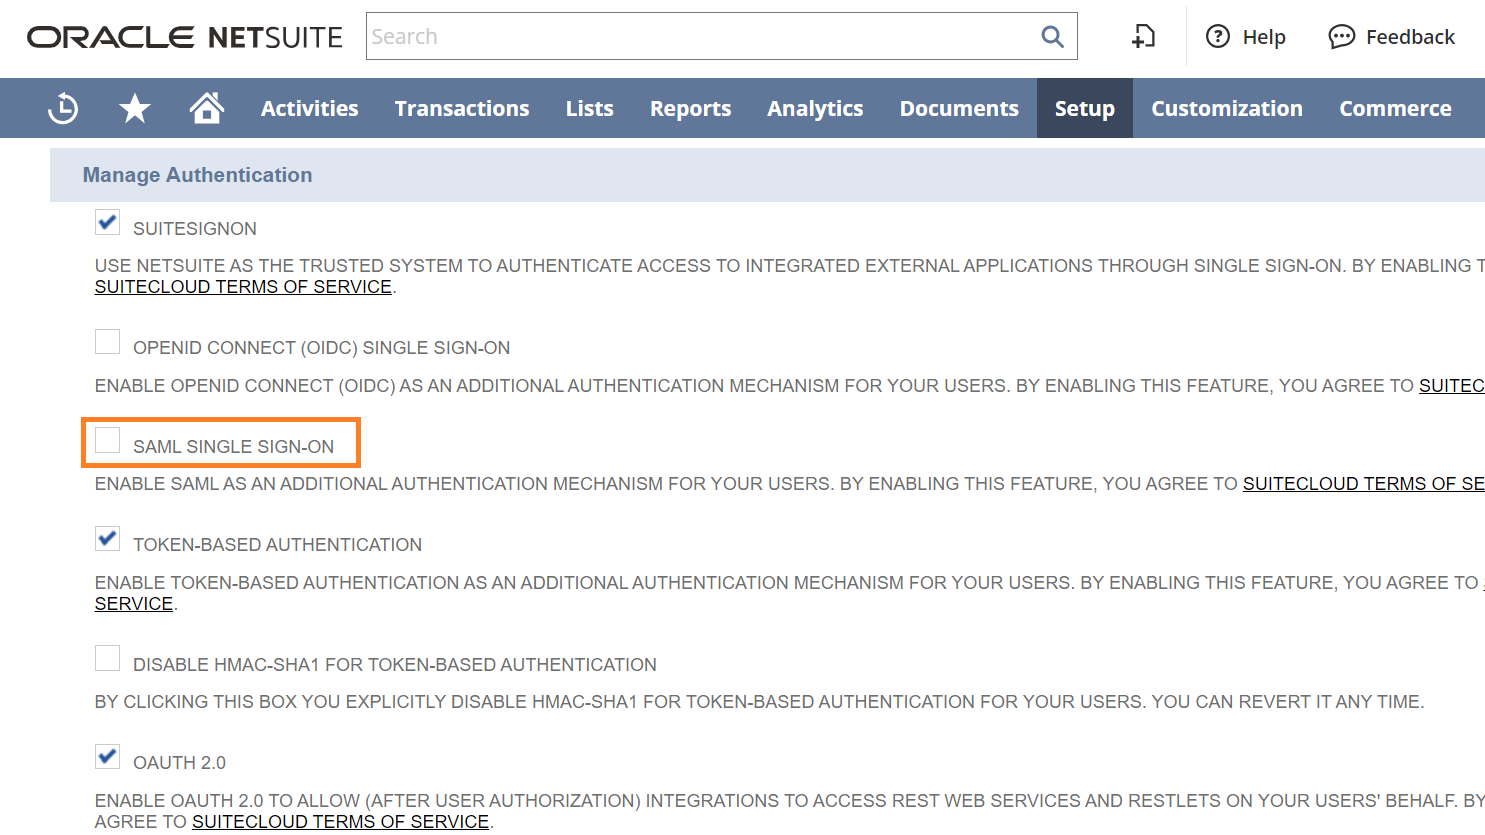
- To enable SAML Single Sign-on, go to Setup > Company > Setup Tasks > Enable Features. Click the SuiteCloud subtab, then check the SAML Single Sign-on box. Agree to the SuiteCloud Terms of Service when prompted. Click Save.
- The User should have Set Up SAML Single Sign-on and SAML Single Sign-on full permission.
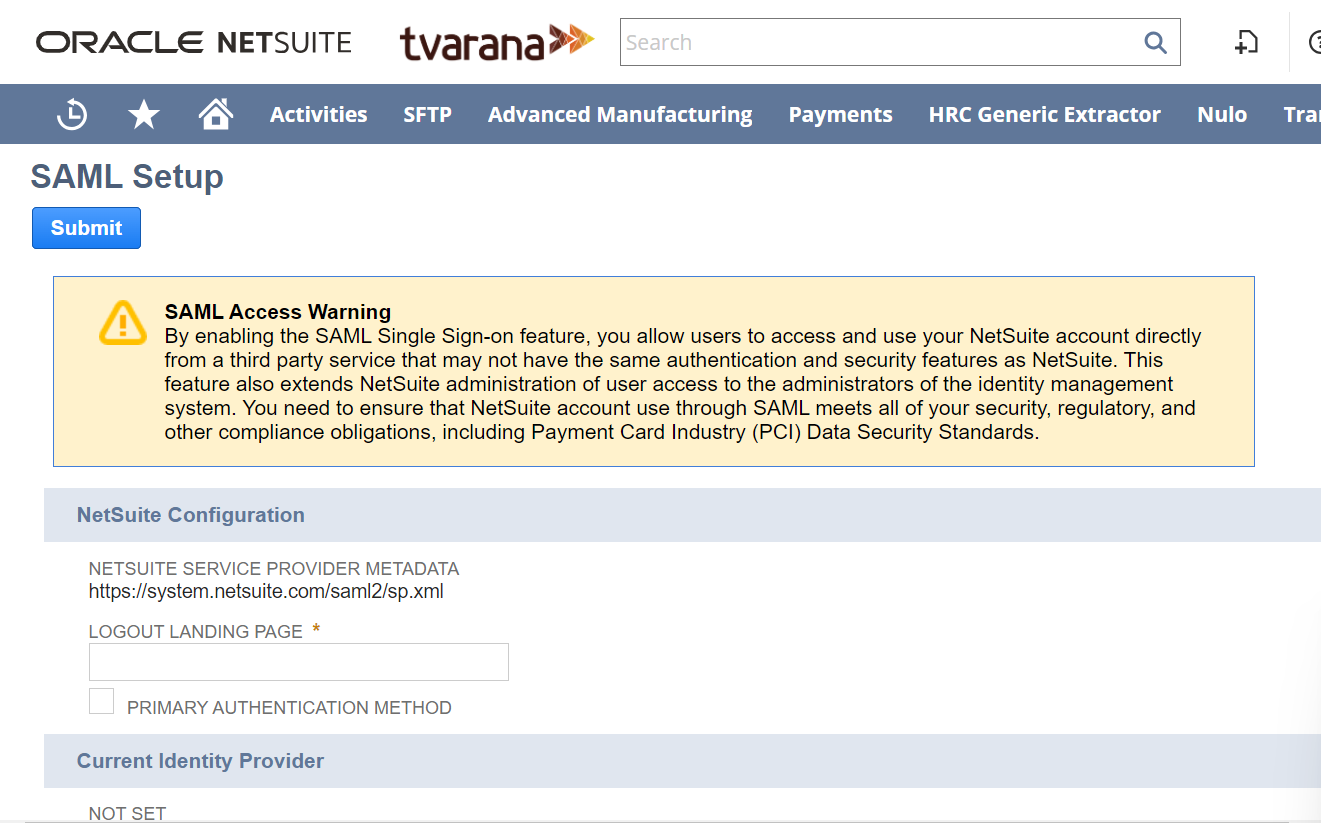
- Obtaining Service Provider Metadata by navigating to Setup > Integration > SAML Single Sign-on.Click on.Then click the link in the NetSuite Service Provider Metadata field and note down the values for of the elements shown below.
| Element | Attribute |
| EntityDescriptor | entityID |
| SingleLogoutService | Location, ResponseLocation |
| AssertionConsumerService | Location |
Configuring SAML Single Sign-on
Following are the steps for setting up SAML Single Sign-on:
- Go to Setup > Integration > SAML Single Sign-on.
- In the Logout Landing Page field, enter the landing page URL.
- Check the Primary Authentication Method box.
- In the Update Identity Provider field group, choose Upload IDP Metadata File. Click Browse to upload the XML file downloaded from the SAML application.
- Click on the Submit button.
Comments