Mastering NetSuite Invoice Grouping: A Step-by-Step Guide
The NetSuite Invoice Grouping feature allows you to send multiple invoices to a customer as a single group instead of sending them individually. This is especially beneficial for customers with a high volume of transactions, as it consolidates essential invoice details while reducing the number of emails they receive. Let’s explore the key aspects of Invoice Groups in NetSuite.
Overview of Invoice Groups
To understand how invoice groups function, it’s important to know their relationship with individual invoices. Standalone invoices that are not linked to a sales order can still be included in a group, and there is no limit to the number of invoice groups you can create for a single customer. Unlike individual invoices, invoice groups do not post to the general ledger (GL); instead, each invoice within the group is recorded separately. You have the flexibility to use invoice groups for as many or as few customers as needed. Enabling the Invoice Groups feature does not require you to create invoice groups for all customers.
Setting Up Invoice Groups
How do you set up invoice groups in NetSuite? Let’s walk through the process.
Enable the Feature
To get started, you need to enable the Invoice Groups feature. You can do this By
Navigating to Setup > Company > Enable Features.
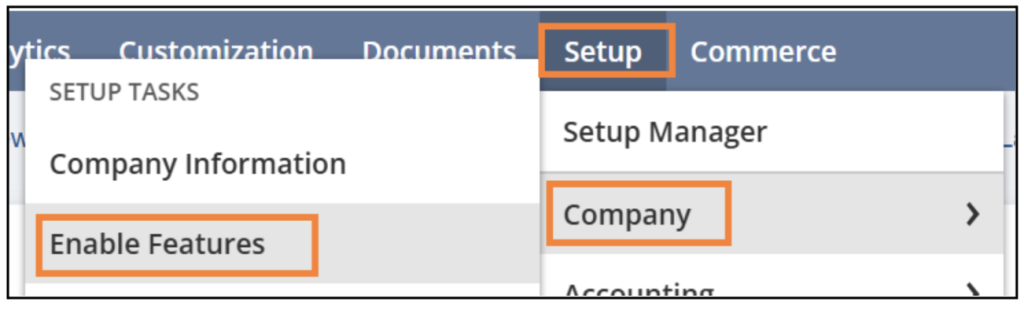
under the Transactions tab in the Billing section.

Keep in mind that once you create an invoice group, the feature cannot be disabled.
Creating Invoice Groups
To Create Grouping Invoices
Navigate to Transactions > Sales > Group Invoices
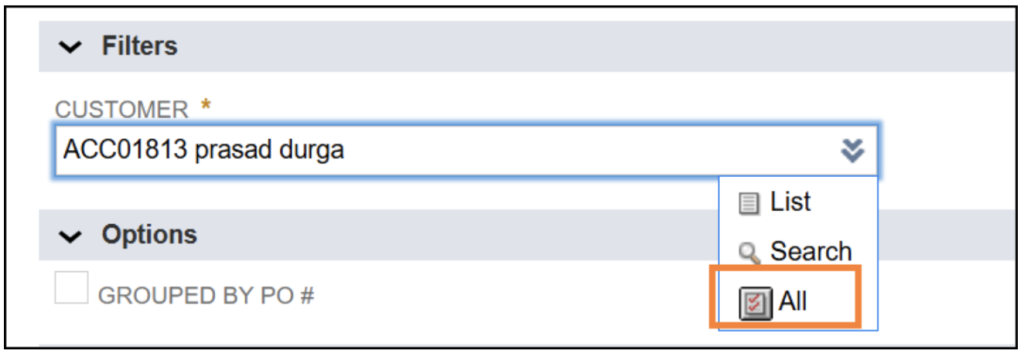
- To group invoices for a single customer, select the desired customer from the Customer dropdown. If you want to group invoices for all customers, choose the All option from the dropdown list.
- Check this box if you want to group invoices by the PO # specified on the invoice record.

- Select the Invoices that need to be Grouped.

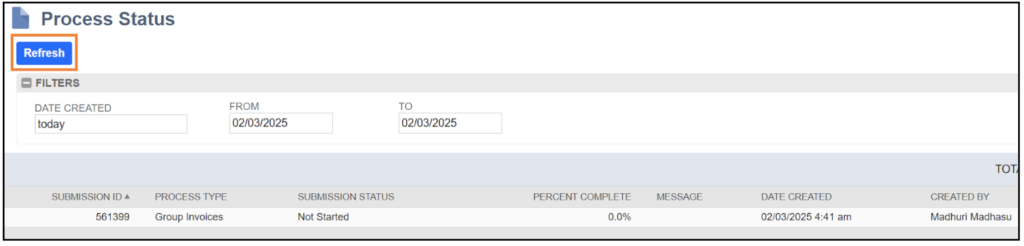
- Click the Submit button. After submission, you will be redirected to the Process Status page. If needed, click the Refresh button to check the completion percentage.