
How to Build an Integration Between HubSpot and Celigo
Celigo HubSpot Connection
Never lose track of your leads and customers with Hubspot integrations. Integrating Hubspot CRM with your ERP gives your finance team visibility into the status of a deal and customer relationships from Hubspot, while your sales team can create better forecasts based on financial information from your ERP. To begin the seamless integration between Celigo and HubSpot, establishing a connection is the fundamental first step. You have two paths to set up this connection:
Method 1: Through the Resources Menu
- Navigate to Connections in the Resources menu.
- Click on + Create connection at the top right.
Method 2: While Working on an Integration
- Add an application to a flow by clicking Add source or Add destination/lookup.
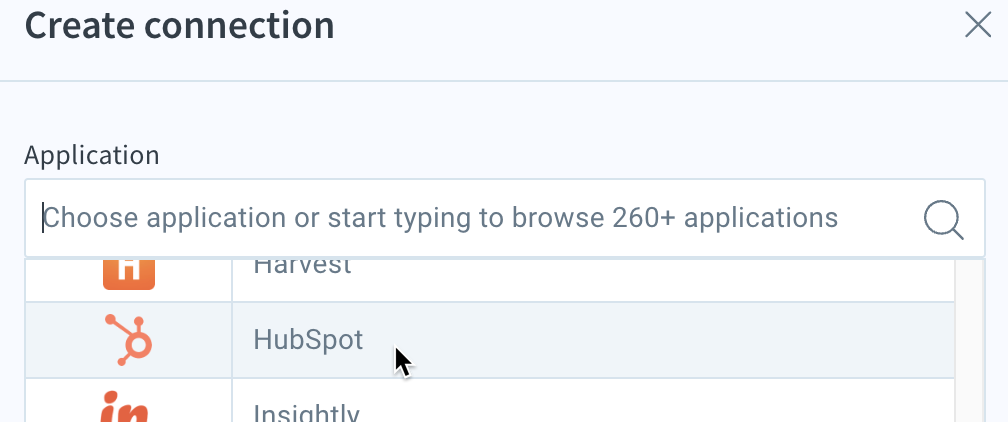
- From the Application list, select HubSpot.
Create Connection Panel
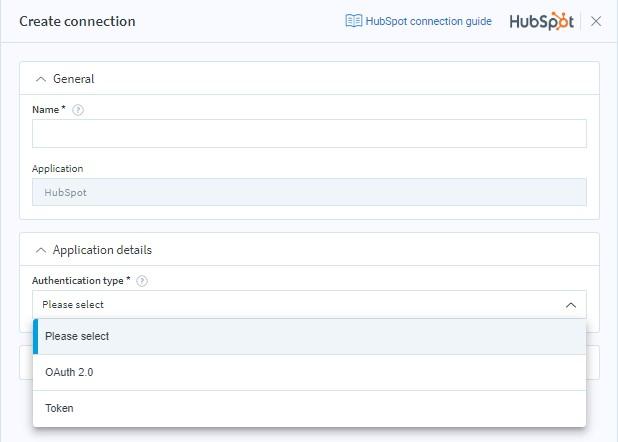
Here, you’ll need to provide crucial HubSpot application details:
- Name (required): A distinct name for easy identification throughout integrator.io.
- Authentication type (required): Select OAuth 2.0/Token for secure access to your HubSpot account.
OAuth 2.0 Configuration:
- Choose OAuth 2.0 and configure scopes to limit access to your account.
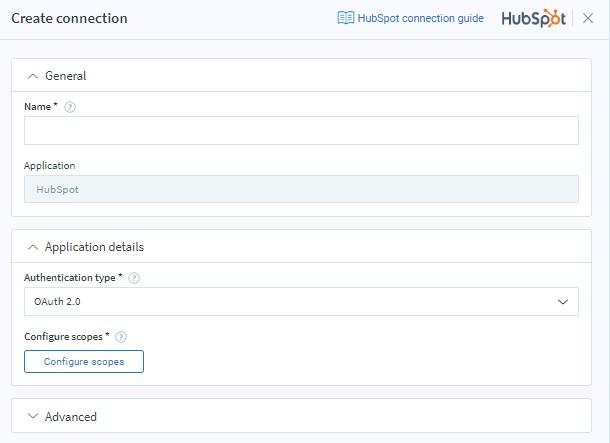
- Configure scopes (required): Scopes are permissions that the HubSpot API defines to limit the access to your account. OAuth 2.0 scopes provide a way to limit the amount of access that is granted to an access token.
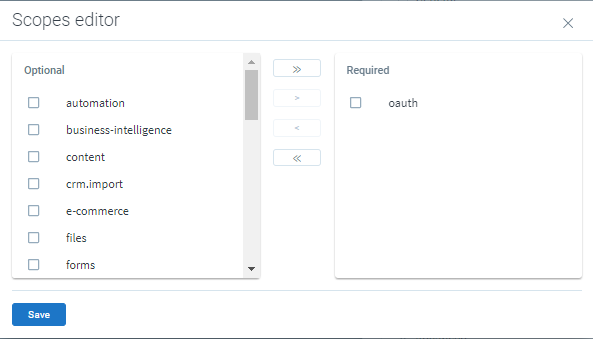
For example, an access token issued to a client app may be granted READ and WRITE access to protected resources, or just READ access.
- Click Save or Save & Close.
- The following page displays:
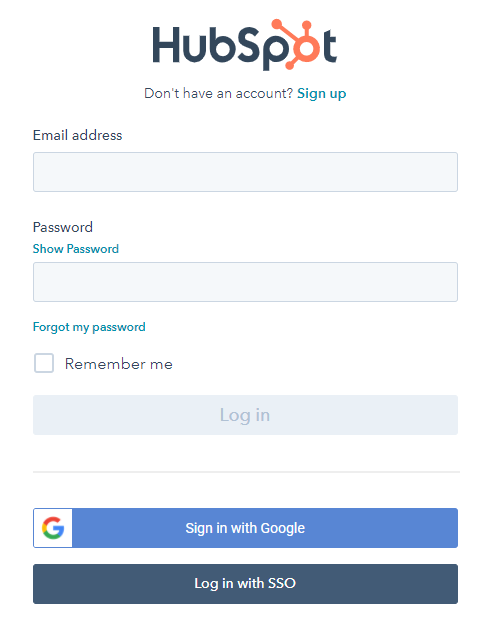
Enter your registered email address, password, and log in to your account.
OR you may see the following:
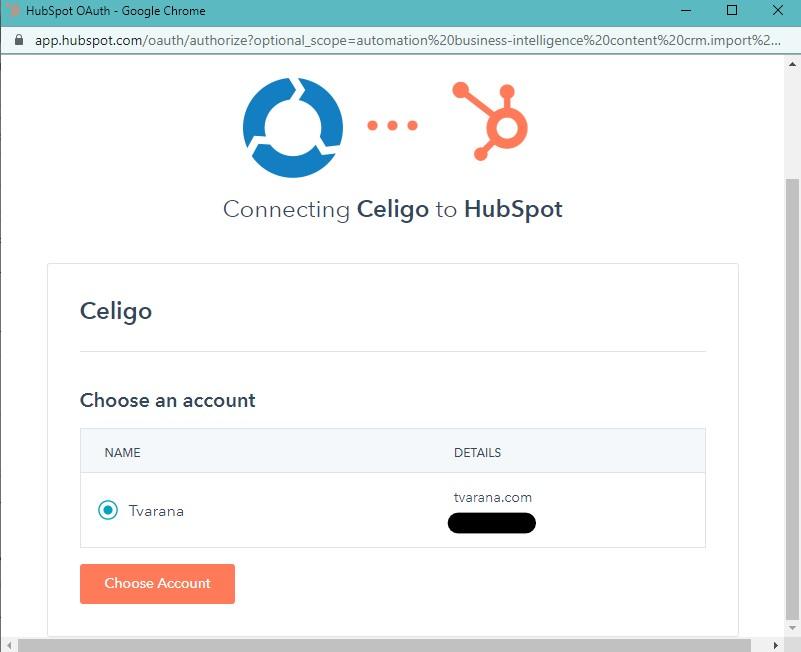
Choose an account.
Token-Based Authentication:
- Authentication type (required): Select Token as the authentication type for this connection.The form changes depending on the selected authentication type.Access token (required): Enter the access token you have generated in or provided to you by HubSpot. Multiple layers of protection are in place, including AES 256 encryption, to keep your connection’s access token safe. When editing this connection later, you must enter this token again; it is stored only when the connection is saved and never displayed as text.
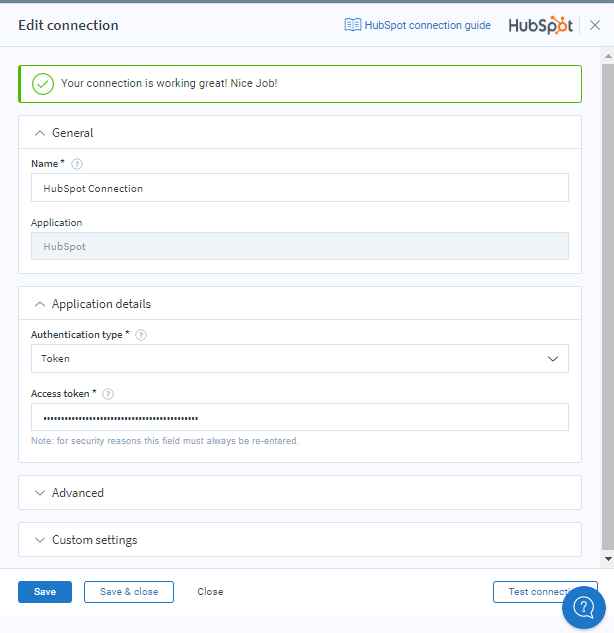
Test Connection
Click Save & Close.
Creating EXPORT Operations
Details Required:
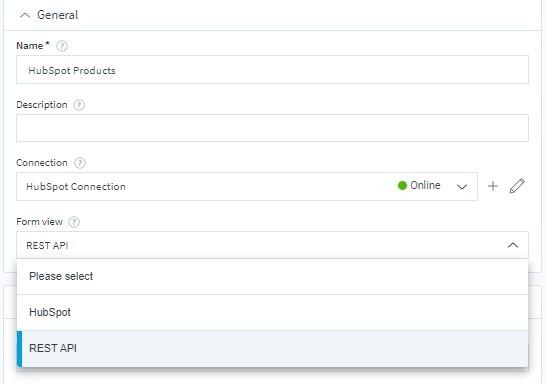
- Name (required): A unique name for easy selection during HubSpot exports.
- Description (optional): Add context for identification purposes.
- Connection (required): Choose the designated connection for this export.
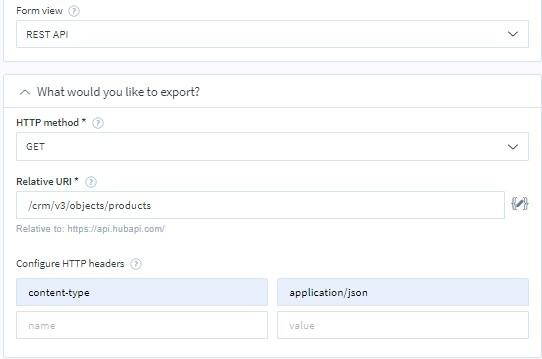
- Form view (required) : Select HubSpot/Rest API as for which form you want to view/ choose the operation as per requirement.
Form View Selection
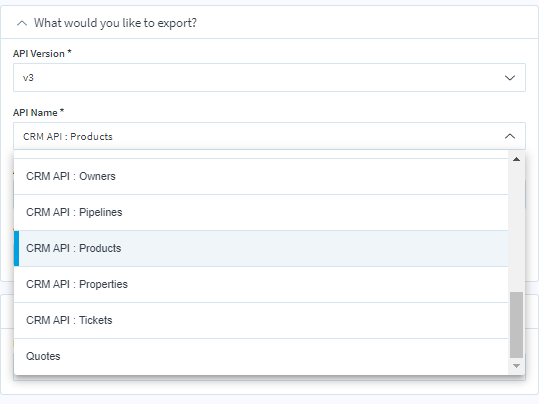
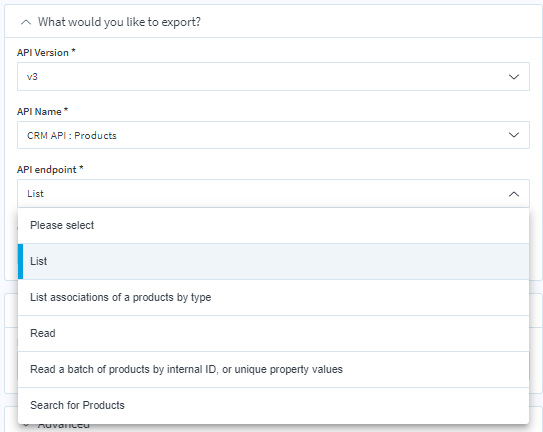
- HubSpot API Version: Choose between V1 & V3 based on your requirements.
- API Name & Endpoint: Select the record type and operation from available lists.
- REST API Configuration: choose the method as per either export or import request
– Relative URI(Required): enter the path of the Request and Response
– HTTP headers: enter the headers as per your Request and Response Body.
Creating IMPORT Operations
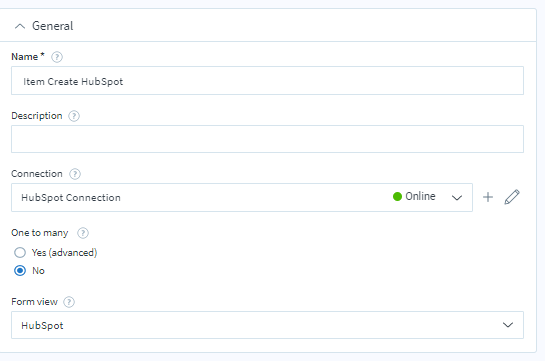
Essential Details:
- Name(required):Provide a clear and distinguishable name. Throughout integrator.io HubSpot exports, you will have the option to choose this export. A unique identifier will prove helpful later when selecting a list of exports you’ve created.
- Description(optional): You can enter a description to identify the export.
- Connection(Required): choose the connection you want to use for this export.
- One to many: By default it is set to No you can set to Yes if one to many is true Learn more
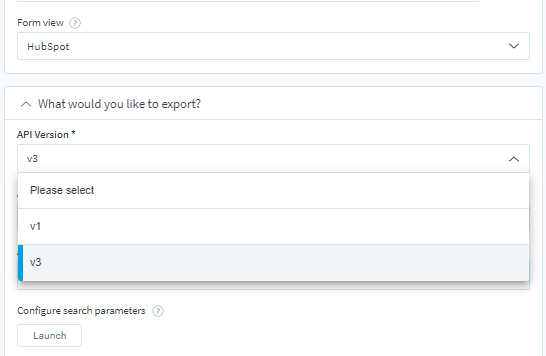
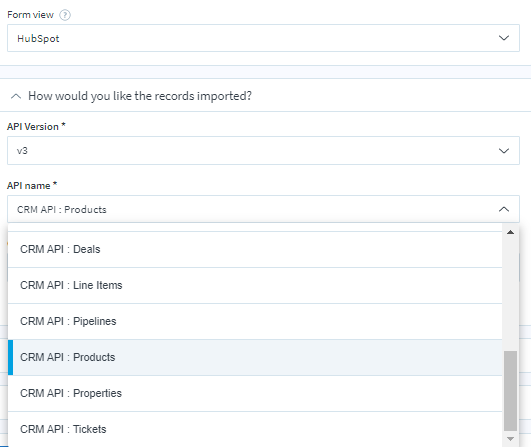
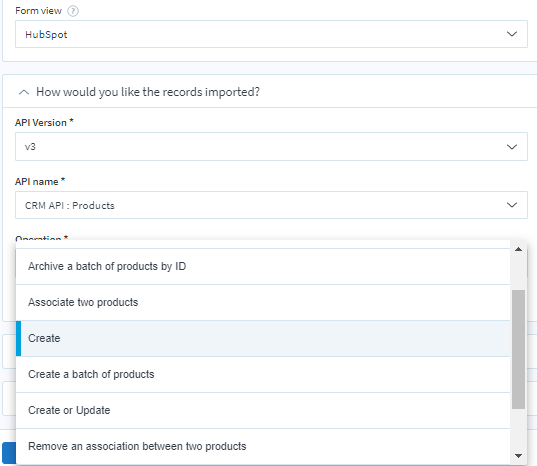
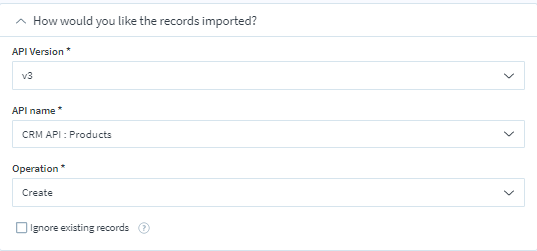
Form view (required) : Select HubSpot/Rest API as for which form you want to view/ choose the operation as per requirement.
- HubSpot
API Version: we have two versions V1 & V3 choose the version as per your requirement.
API Name(Required): choose the record type from the list available.
Operation(Required): choose the operation from the list available.
Ignore existing records: check this box if you want to ignore already existing records.
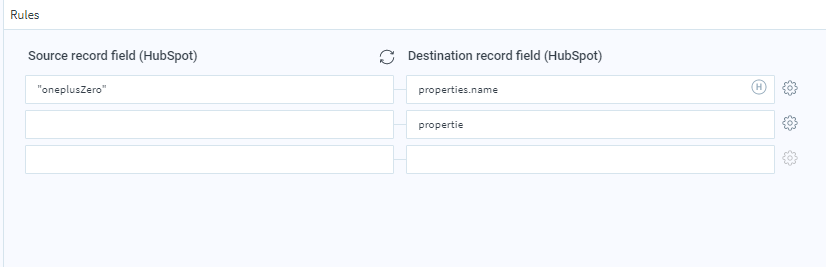
Mappings:
Source record fields: Map the fields by choosing from the source field list or you can give static values (example “Oneplus_88 ”).
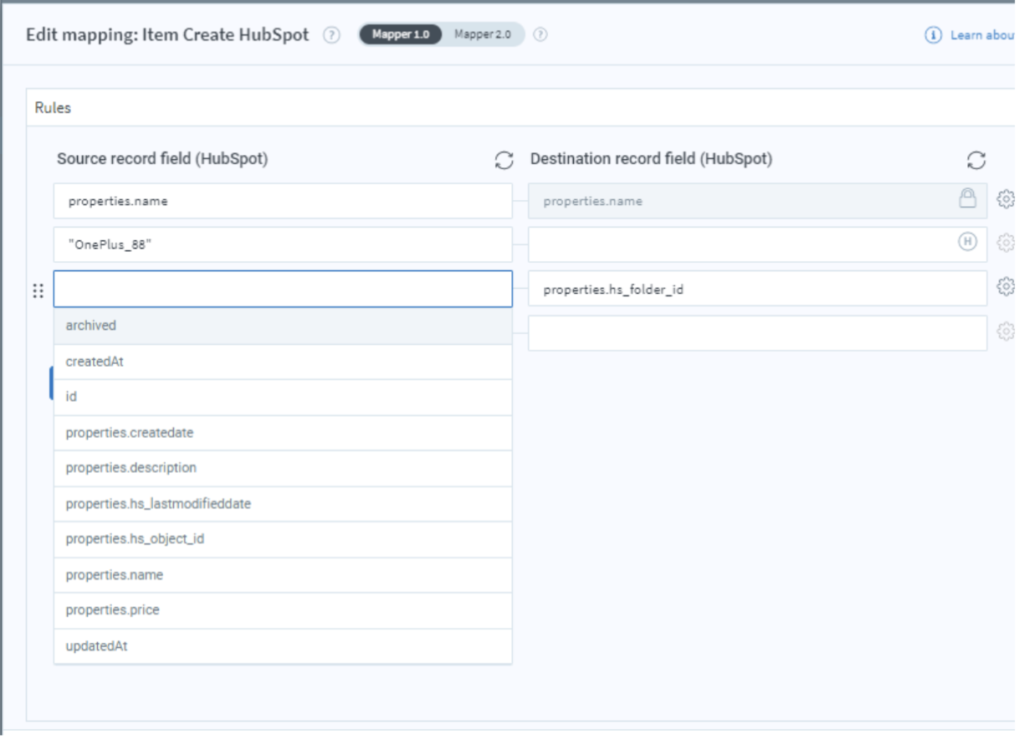
Destination record fields: Map the fields by choosing from the destination field list.
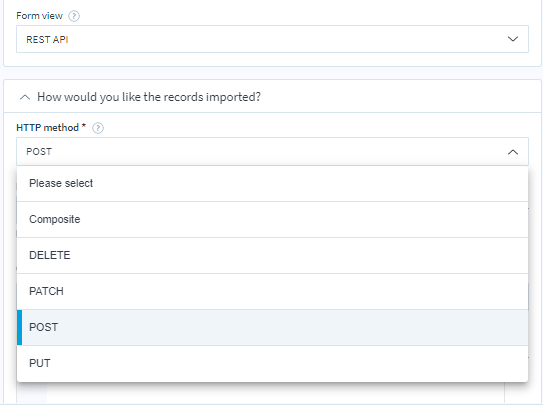
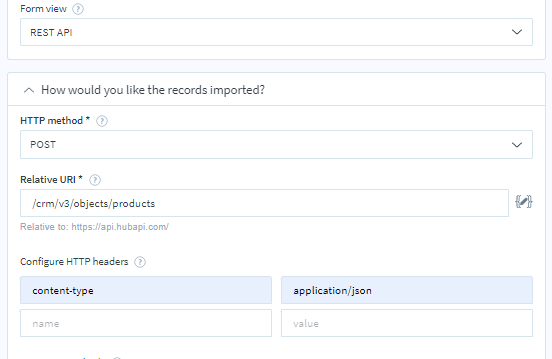
REST API Configurations
HTTP Method(Required): choose the method as per either export or import request
Relative URI(Required): enter the path of the Request and Response
HTTP headers: enter the headers as per your Request and Response Body.
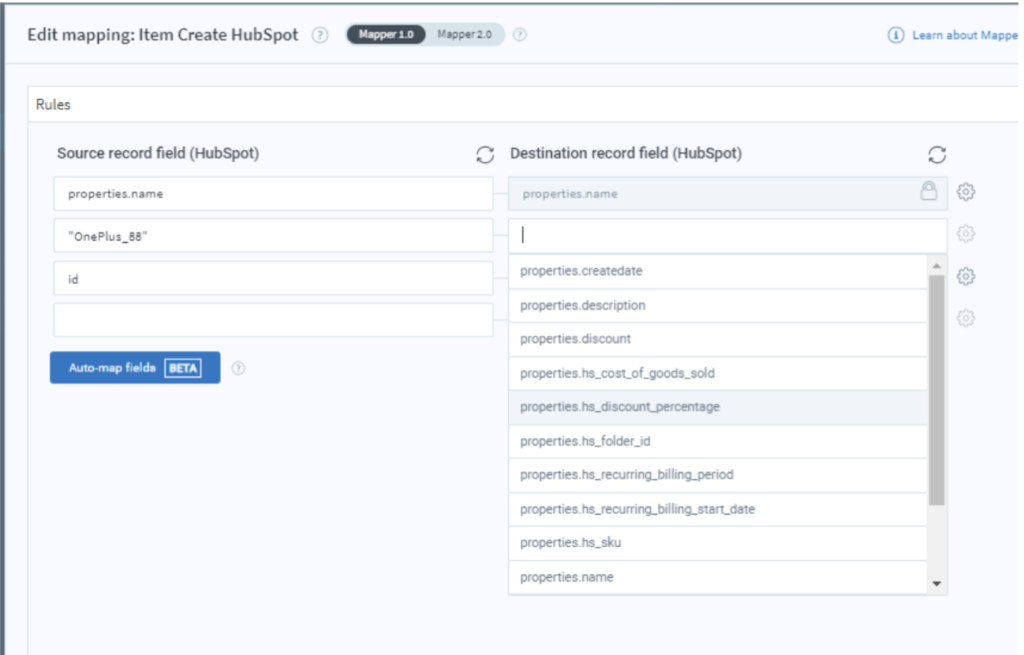
Mappings:
Source record fields: Map the fields by choosing from the source field list or you can give static values (example “Oneplus_88 ”).
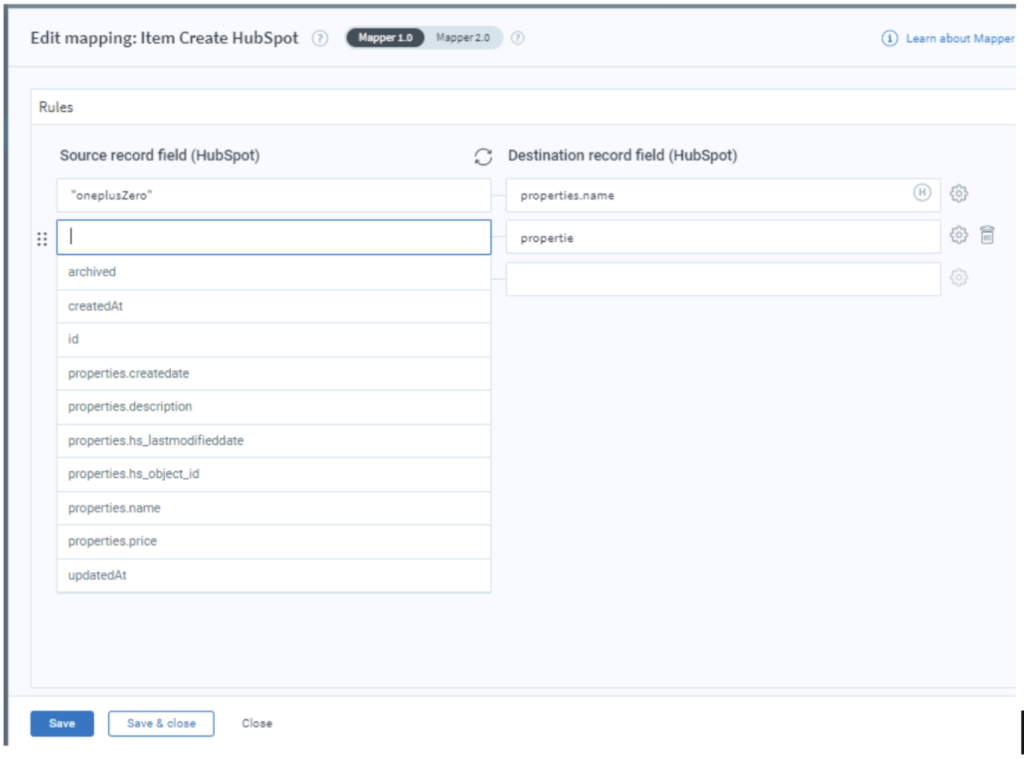
Destination record fields: Map the fields by entering fields.