
How To Create a SuiteApp Using NetSuite SuiteBundler
Suitebundler allows NetSuite users to package a group of objects for distribution to other accounts. These packages are called “Bundles or SuiteApps”. NetSuite provides an assistant called Bundler Builder that helps you to create bundles. Users with “SuiteApp Marketplace” permission can install and create bundles.
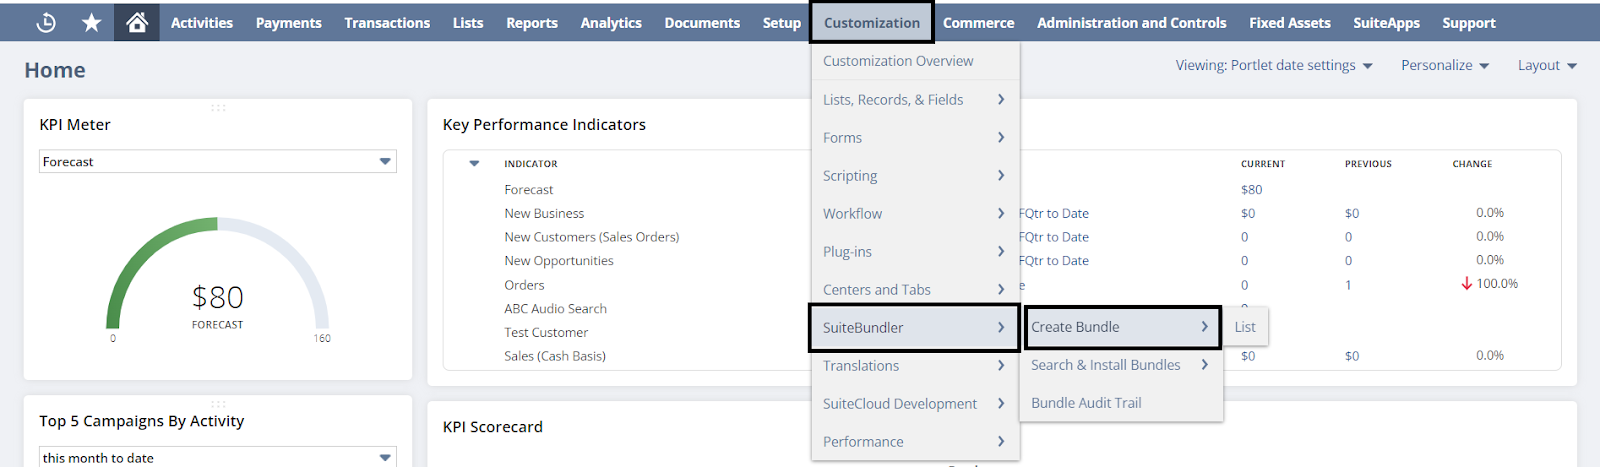
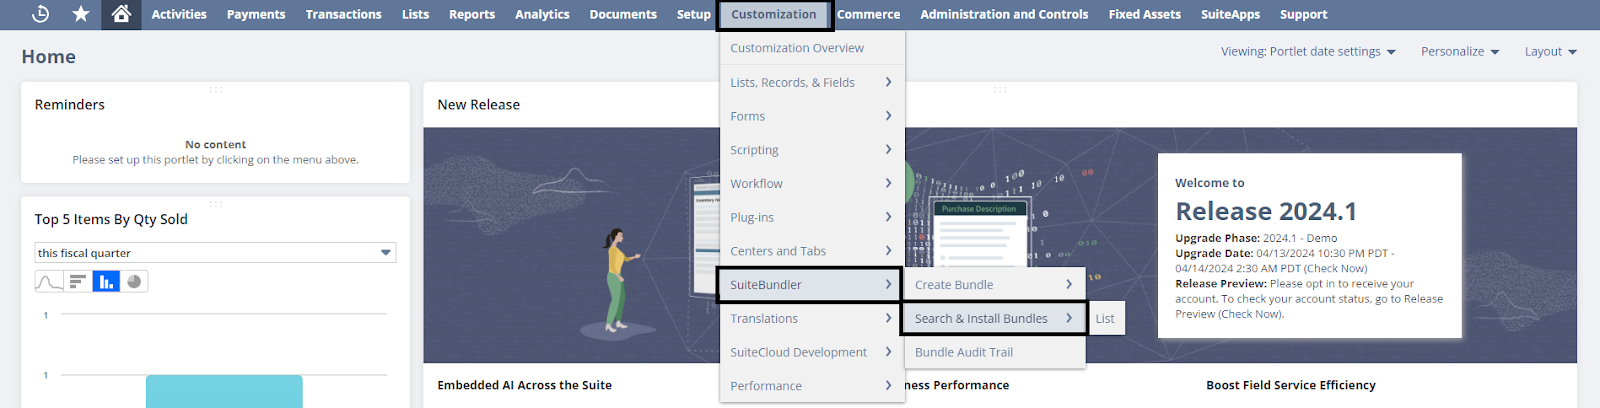
To begin, navigate to Customization -> SuiteBundler -> Create Bundle.
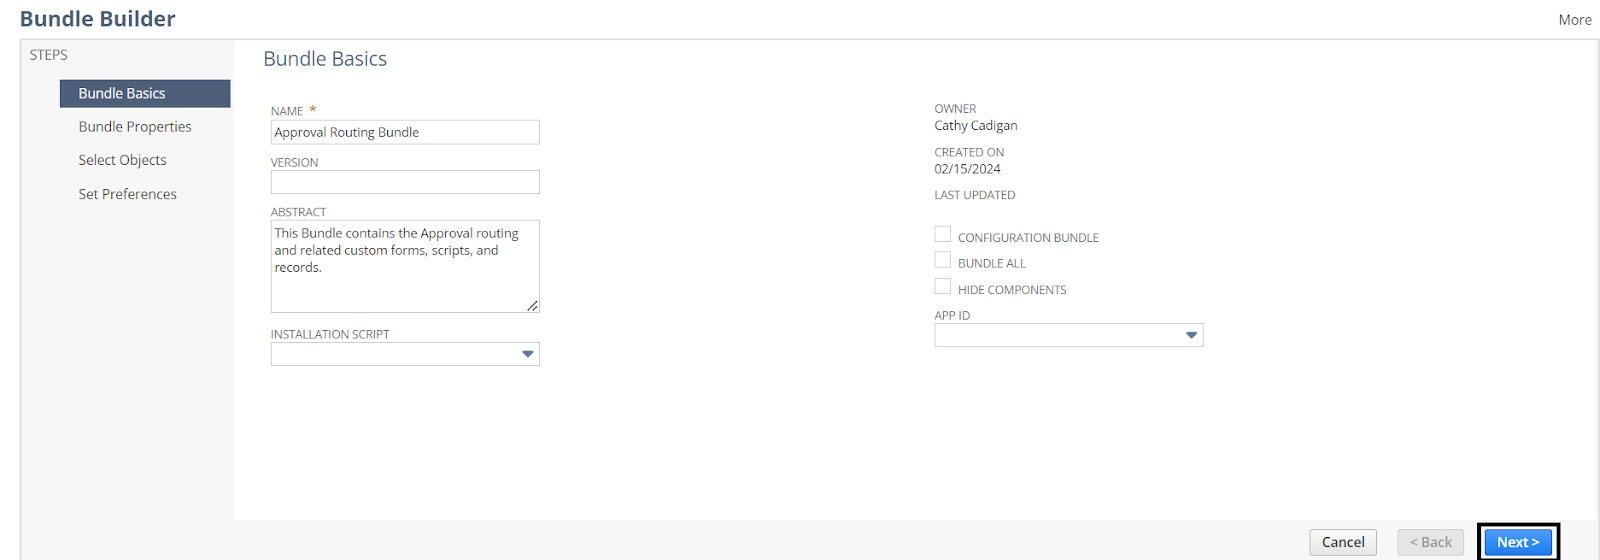
Step 1: Enter the bundle name and abstract (Summary level description) in the first step. Check the Hide Components if you want to hide the components that are included in the bundle. Click Next.
Step 2: Enter the Description for the bundle and select the Product, Language, and Admin Documentation (Document on the Bundle usage). Click Next.

Step 3: In this step, Select the Object Type (Eg: Scripts, Searches, Forms, Reports) and then choose the objects for the bundle. Select all the objects that are required for the bundle and click Next.

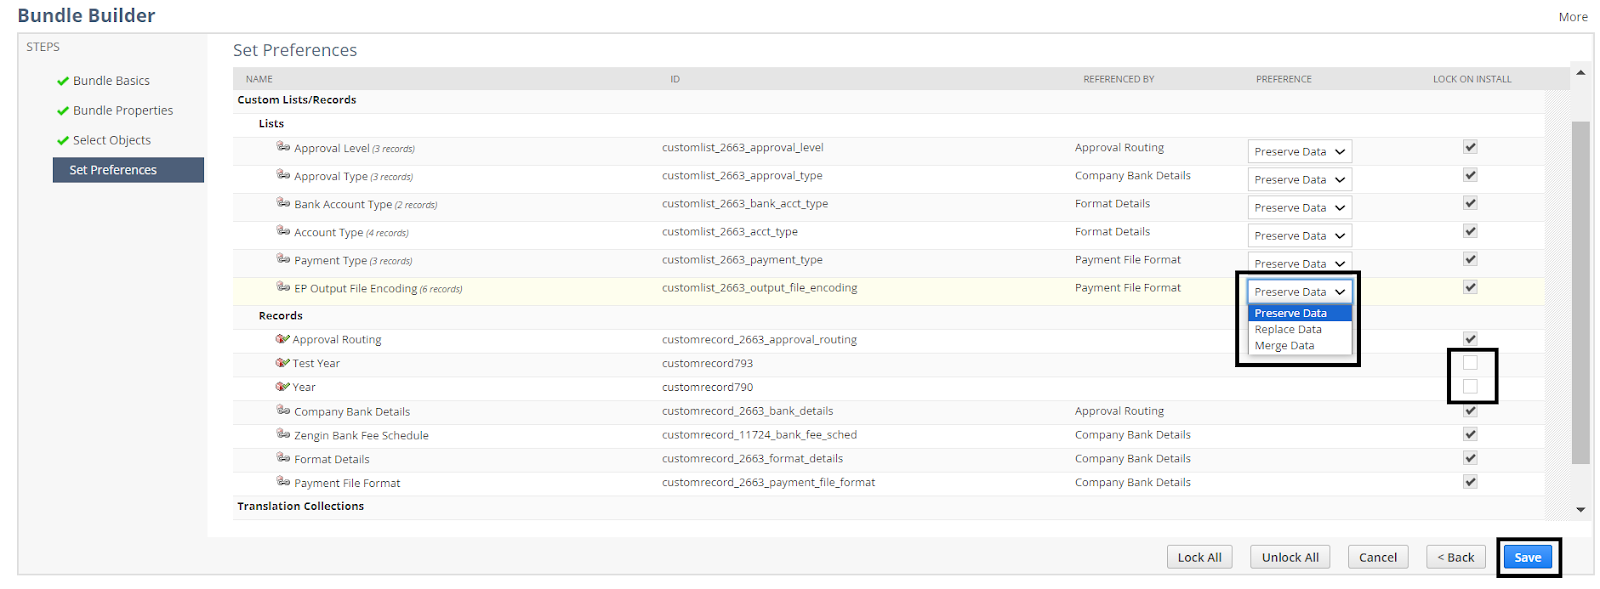
Step 4: Review all the objects that are being packing into the bundle. The objects can be locked after installing by checking the box under the Lock on Install.
- Preserve data – bundle does not make any changes to the target account
- Merge data – bundle merges the custom segment values without deleting any segments in the target account
- Replace data – bundle to replace the custom segment values in the target account.
Click Save.
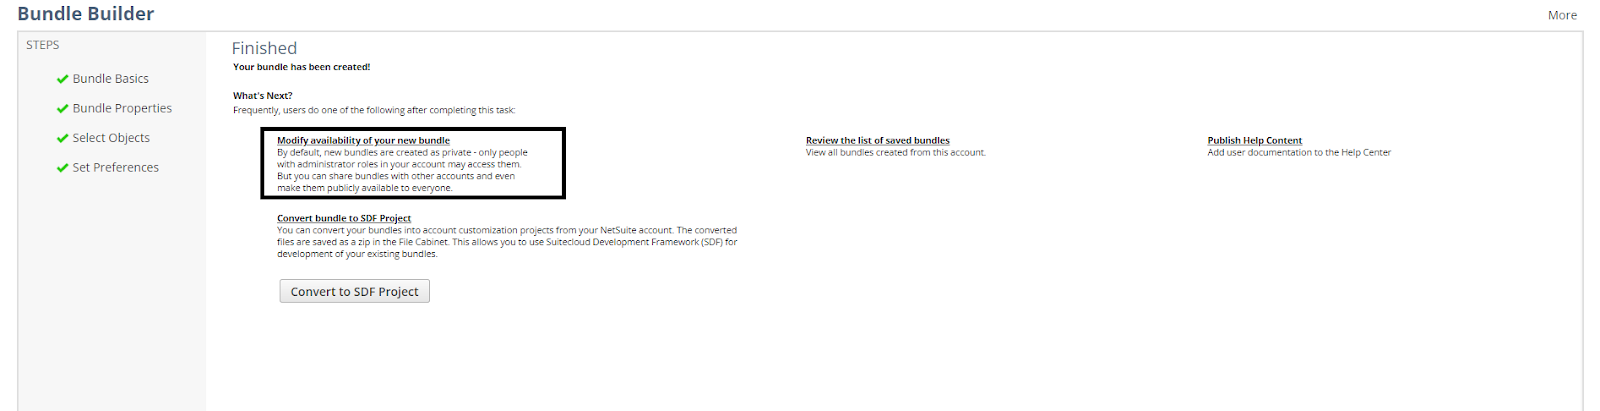
The bundle availability can be set as private, public, or shared.
Click Modify Availability of your new bundle, and Select the Level – Private or public or Shared.
Provide Account IDs with whom the bundle is being shared when a shared level is selected.
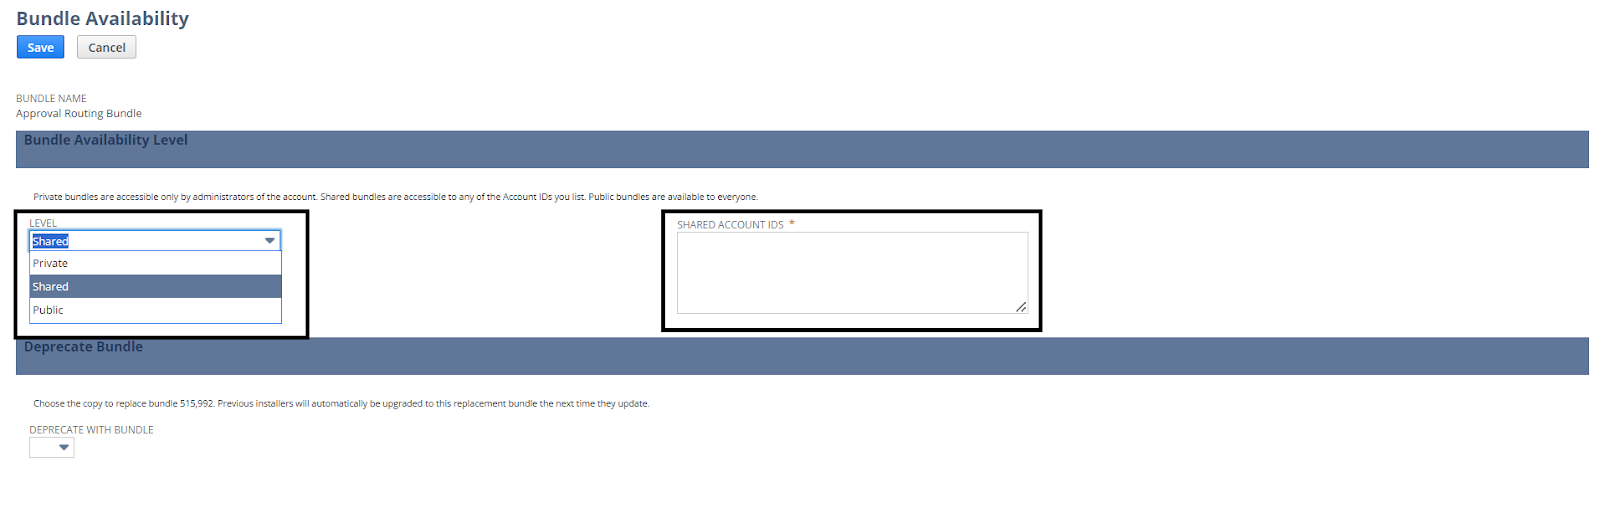
Click Save to save the access level of the bundle.
The bundle generates an ID, which can be used to find the bundle in the target account.

Now, log in to any other account and navigate to Customization -> Suitebundler -> Search and Install Bundles.
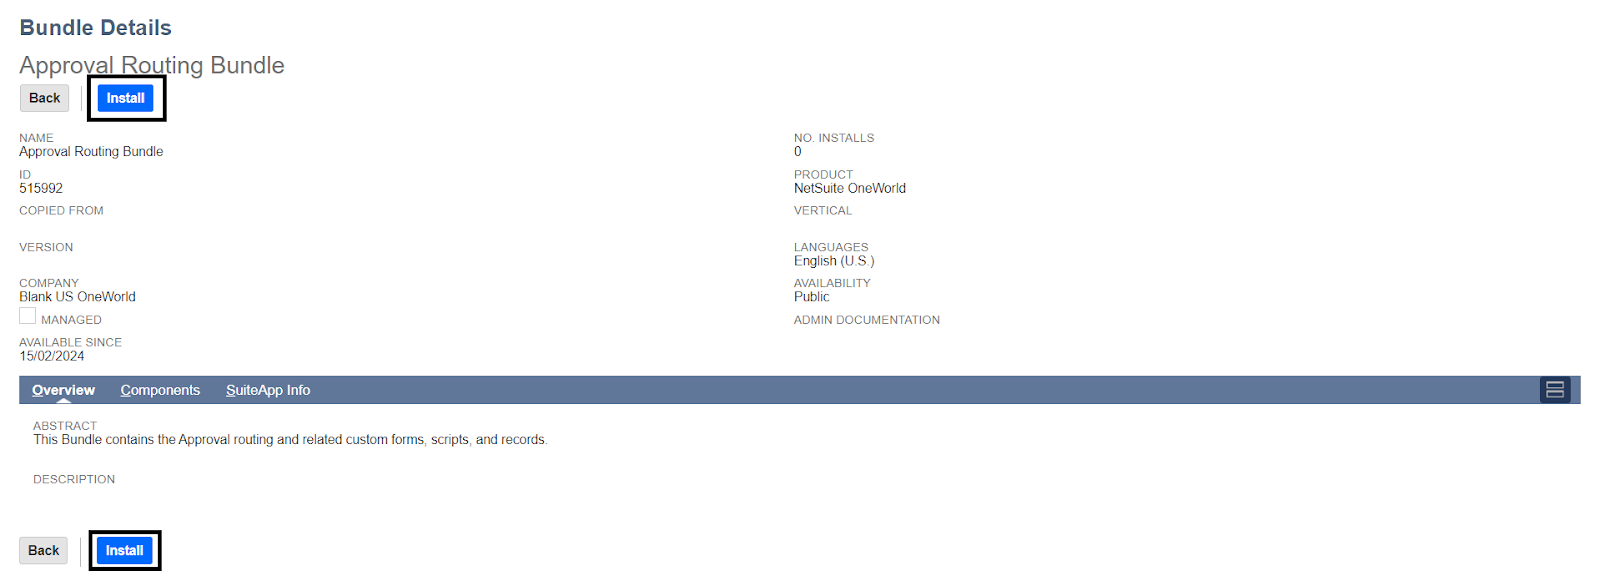
Search for the bundle using the Name/ID in the keyword field and click search.

Open the bundle and click the Install button
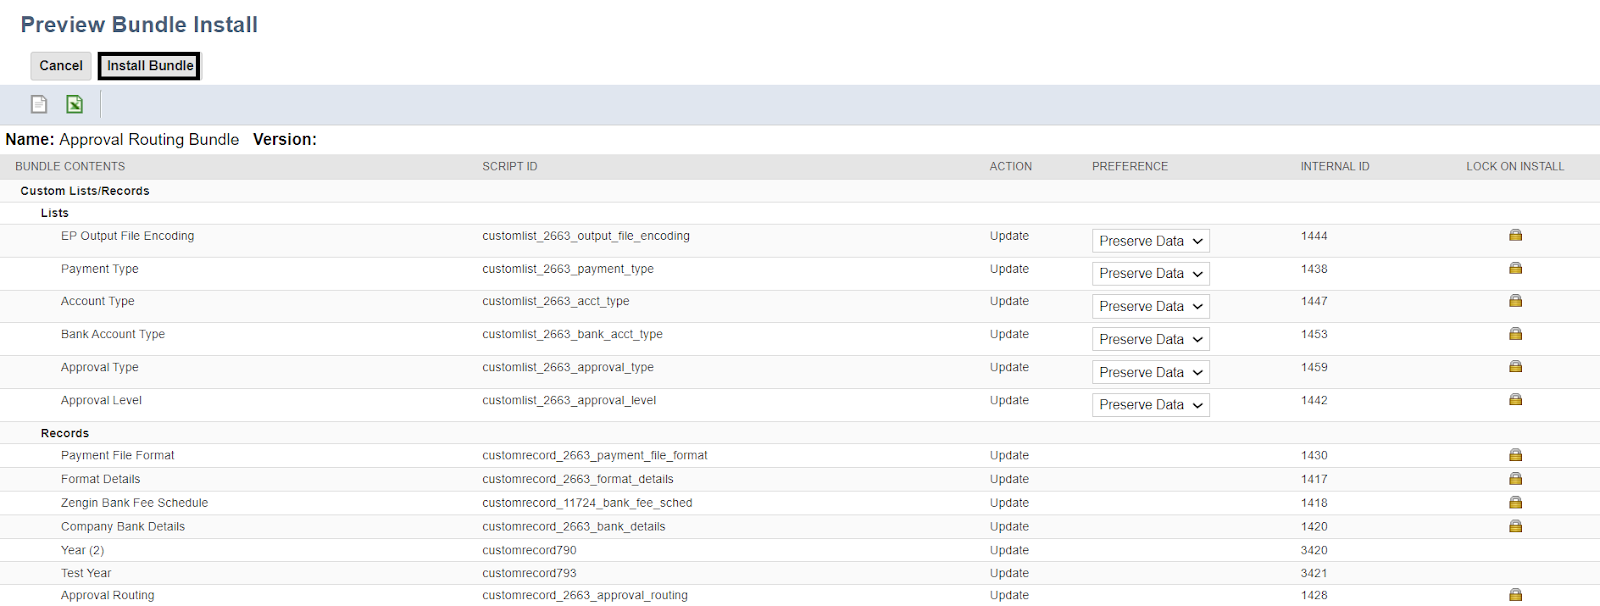
You will be shown the preview of the bundle content. Review and then click the Install Bundle button.
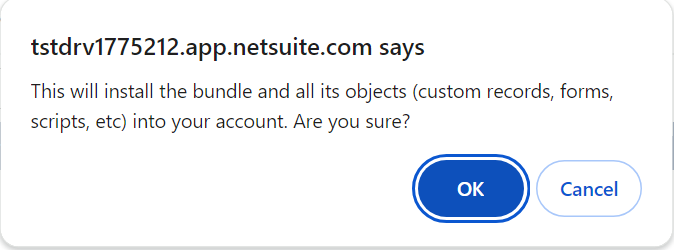
A pop-up displays a message stating that the scripts, forms, and fields related to the bundle will also be installed into the account. Click Ok.
This will redirect to the Installed Bundles page. Wait until the status changes from pending to Complete.
Refresh the page to see that the bundle installation is now complete.

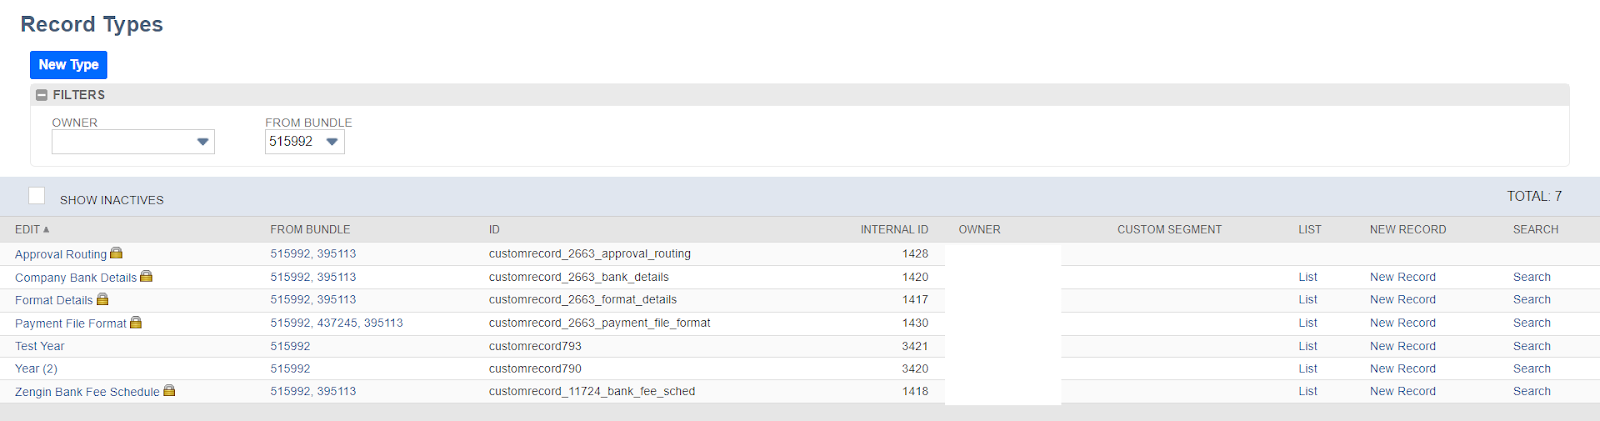
To check if the components of the bundles have been installed into the account, use the Bundle ID to filter out the content related to that bundle.

The bundle is now successfully installed.