

Automating Data Imports with SuiteScript: CSV Processing
The CSV Import feature within NetSuite implementation is a robust tool enabling the mass creation or updating of a specific record type in large volumes. This functionality proves particularly beneficial when there’s a need to transfer data from an external source into the NetSuite implementation. Users can carry out this task effortlessly, even without extensive technical expertise, thanks to a minimal training program. However, there are instances where clients seek digital transformation to streamline processes without manual intervention. For instance, there might be a requirement to automatically import all CSV files located in a specific folder every two hours or retrieve CSV files from an external server, initiating CSV Import twice daily.
Under such circumstances, 79Consulting’s team of NetSuite Consultants create customizations to automate these procedures through the utilization of SuiteScript. Fortunately, within NetSuite implementation, there’s a feature that enables the execution of such tasks using SuiteScript in every version of SuiteScript. However, with each iteration of this API, we have encountered certain limitations.
In this blog, we will explore the process of achieving CSV Import through SuiteScript across various versions. We will delve into the specific limitations associated with each version, providing detailed insights into when and where to utilize a particular version. Before we create SuiteScript to perform CSV Import, we need to create a “Saved CSV Import” record.
How to Create a Saved CSV Import Record:
Navigate to Setup > Import/Export > Import CSV Record
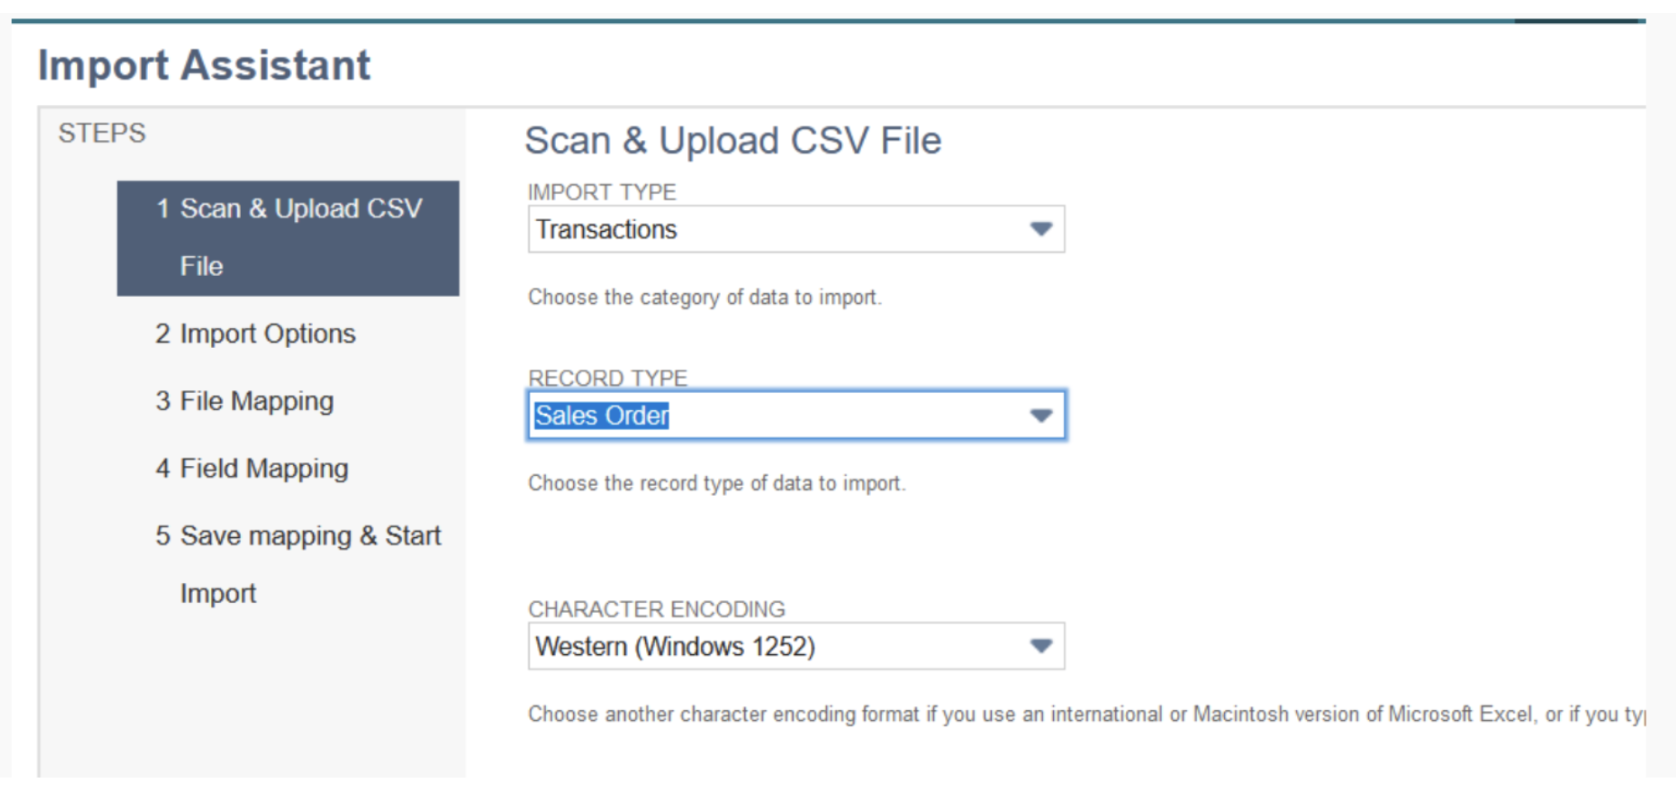
Step 1: Choose the Import Type, Record Type, and configure other file-related settings. Select a sample CSV file to facilitate the mapping of file columns with the corresponding NetSuite record fields.
Step 2: Press “NEXT” and choose the Import options, selecting among “Add,” “Update,” or “Add OR Update” based on your specific needs.
Step 3: Proceed to the next step and establish mapping fields between CSV file columns and NetSuite record fields according to your specific requirements.
Step 4: The next step is to create a script.Firstly need to create a task using task.create and then submit the task.
By automating CSV imports through SuiteScript, businesses can significantly boost productivity and reduce manual effort. Leveraging this approach streamlines data handling, allowing you to focus on more strategic initiatives.
If you’re looking to implement automated CSV imports or other NetSuite customizations, our team at 79Consulting is here to help. Schedule a consultation with us today to explore how we can tailor NetSuite solutions to meet your business needs.